Stenciled Art Journal Pages
For the last couple years I have committed to creating a blog post at least once a week, so it is a regularly scheduled (and predictable) task. But still every week I struggle to get it done in a timely manner! There’s always something...this week I began cleaning off my work table on Sunday evening… continued all day Monday… and finally by Tuesday evening I had room to work on my project to document for the blog.
Part of my clean up/organizing session was to take all of my small 6" x 6" size stencils (on sale this week!) and place them in an old photo album — remember the kind with the ‘magnetic’ pages? We know now not to damage our photographs using these, but they can make great organizers for stencils!
I placed two stencils per page. It remains to be seen if they will be returned to their place in the album after use. Anyway, on to the meat and potatoes of this posting! I wanted to illustrate create a two-page spread in an art journal so that the backgrounds connect.
I have several pages already painted in my stash. Remember to pull out your art journal or loose pages as you finish up any painting project: use them to get the excess paint off your brushes or applicators, rather than washing all that color down the drain.
Above, I have aligned two loose pages together, and then placed a large 12" x 12" stencil so that it the design will appear (asymmetrically) on both pages. Notice off to the side the Colorbox stylus (black handle) with a small foam tip on the top. This is the tool that I use to apply my paint through the stencil, using in soft rotating circular motions. (The Artistic Artifacts website sells the Colorbox stylus handles and reusable foam tips.)
I do spray my stencils using 404 Spray and Fix Repositionable Craft Adhesive, and I have an important tip for you: let the sprayed stencil air-dry before placing it on your journal page. If you don’t, it will stick! (Ask me how I know.)
Above, inset, I have applied a silver metallic through the stencil, and the result once the stencil is picked up.
Above, I have placed a portion of a different stencil so that it is positioned off the page. This gives the design some movement and a natural look. This photo also shows another way I save paint: I used the wooden tongue depressor to stir my paint up, and am taking the paint left on depressor up with my stylus tool to apply it.
Above, one page completed with several colors of paint, and after moving the stencil around several times.
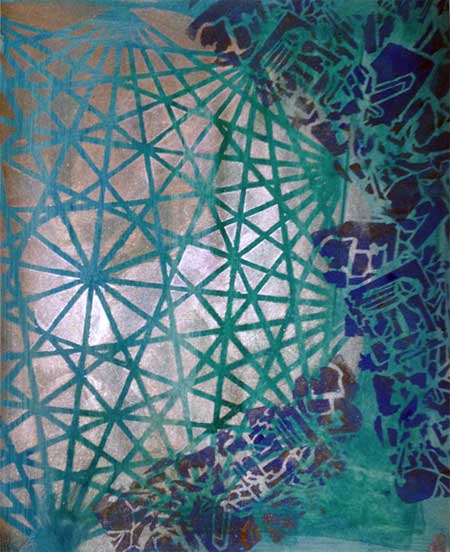
Working on the second sheet of this spread, I positioned the entire TCW522 - Rock Crystals stencil down on the page. After painting (above), I thought it looked a little bare at the top, so I moved the stencil around again, resulting in the below. Better balanced, wouldn’t you agree?
Below, the background stenciling and painting of this spread is completed. There is cohesion between the two pages, and the pages are now ready for me to continue on, adding photos, drawings, ephemera and more.
P.S. If you were wondering...when I have the time to work on pages for the round robin art journal that is currently goining on through JAMs, but don't have a journal in my possession, I work on a spread of two loose pages. That way when time is at a premium, I only need to glue in the completed pages.








Leave a comment