Strip Piecing meets East
At Artistic Artifacts we had fun creating a pattern for the Row by Row Experience. (Well, let’s be honest: I had the fun part of the job, Sharon had the hair-pulling part of actually writing the pattern!)
But since our agreement to participate in this huge shop hop means we are unable to publish our Springtime Flora & Fauna pattern until this fall (after Row by Row ends), I came up with another piece to illustrate Rayna Gillman’s wonky strip piecing technique, a key design feature in our row.
I learned how to embrace rotary cutting without the rulers from reading Rayna’s book, Create Your Own Free-Form Quilts: a Stress-Free Journey to Original Design. If this technique interests you at all, I heartily suggest buying the book...for one, I can assure you her diagrams are much better than mine! Plus what I am about to show you is only one portion of the book, which is an amazing modern/art quilt reference I often recommend.
At Artistic Artifacts we have recently received a new shipment from Indonesia of wonderful Batik Panels by our artist friend Jaka. He creates imaginative designs, especially people: from women with an attitude to family settings, and village scenes. I have named the panel that caught my eye for this project 2 Girl Friends; it can be purchased from our online store.
I knew immediately that I would put an inner border using a beautiful royal blue batik, and it looked wonderful with the panel colors.
Free-Form Strip Piecing
Next was the strip piecing. Rayna encourages you to use leftover pieces of fabric that have already been cut for other quilt projects. But if, like me, you don’t have enough long strips hanging out in your stash, simply pull a variety of fabrics and cut strips. For this project mine are approximately 18 to 22" long and 1¼" to 1½" wide. In her book Rayna recommends as a guideline initially working with strips that are 8" to 15" long and from 1" to 3" wide.
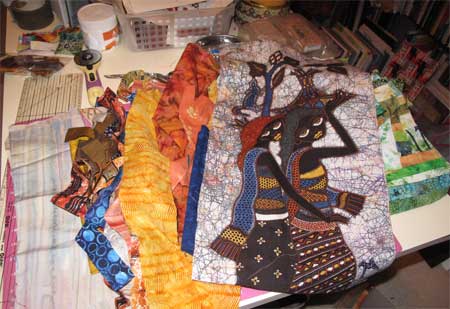
Below, the fabrics selected for strip piecing. (This is a real “behind the scenes” view: the messy tiny corner of my work table!)
Here I have two strips ready for the process. My selected fabrics that have been cut (or torn) are placed, both right side facing up, with a slight overlap.
Cut a gentle curve with your rotary cutter along the overlap. You are freehand cutting, no ruler needed! The sliver of purple showing underneath the orange, and the orange showing under the purple, are pulled away and not used: you will have a two strips with matching curves.
This part can be a bit tricky. When your two strips are placed, right sides together, to be sewn together the curves do not match up (as seen in the below photograph).
If you have ever sewn a curved quilt block, such as a Drunkard’s Path, you will already be familiar with this concept, but if not, you have to pull the convex and concave edges of the fabrics together to be able to sew a seam. If your curves are gentle, this can be done by hand while you are at the machine, but if you don’t feel comfortable, pin the strips together to have the “peaks and valleys” (as Rayna calls them) match up. If you haven’t previously sewn curves together before it won’t seem as if they will seam together flat, but they will!
Above, two wonky strips sewn together. Notice the imperfect seam allowance! In her book Rayna teaches you that you don’t always have to aim for a 1/4-inch seam allowance, that between ⅛" and ¼" is fine. I tested any of my seams that looked thin by gently pulling them apart; if the seam did not hold, I just stitched over it again.
Below, the front side of my free-form strip segment. One strip attached, many more to go! But these go together quicker than you might think, and it’s fun piecing because there’s no stress...imperfection is your goal.
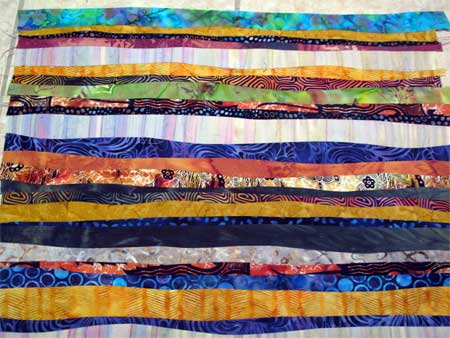
Below, my completed unit of free-form strips. From this, I then cut bands that I used to border my panel.
And just in case you want to see this from the back, I’ve included the photo below. I pressed all of my seam allowances to one side. while you are stitching, you don’t worry if some are longer than others. Using Rayna’s method, the only time you use a ruler with your rotary cutter is to trim square those strip ends and to cut strips for borders (as I am) or blocks for precise piecing.
Below, here is my completed 2 Girl Friends Jaka batik panel with strip piecing edging. Well, completed without being layered, bound and quilted! Click on the photo for a larger view.









Leave a comment